OVERVIEW
Distributed Replicated Block Device (DRBD) is composed of block devices that form high availability (HA) cluster.
 |
| Distributed Replicated Block Device (DRBD) |
The illustration shows two servers (active and passive nodes) that form HA cluster. Each server contains file system, buffer cache, disk scheduler, disk drivers, TCP/IP stack and network interface card (NIC) driver.The black arrows shows the data flow for each components. The orange arrows show the data flow as the DRBD mirrors the data of the high available service of the active node to the passive node of the HA cluster.
[Reference: http://www.drbd.org/]
[Reference: http://www.drbd.org/]
PROBLEM STATEMENT
The installation of DRBD will be executed next laboratory session. The task today is to install and configure mysql server and php5. Another task is to create a dynamic web page with the following functionalities:
- Login and Logout
- Add user
- Edit user
- Delete user
**A user needs a username and password.
GUIDES IN SOLVING THE PROBLEM
To test if MYSQL is running, type this command, $ sudo netstat -tap | grep mysql.
To install PHP, type this command, $ sudo apt-get install php5.
Creating Database
After the installation of MYSQL and PHP, building of the database to be used can now be done. To start MYSQL using terminal, type this commande: $ mysql -u root -p.
We need our knowledge in the CMSC 127 class to create the database =)
Creating the Webpage
Installation and Configuration of MYSQL and PHP
To install MYSQL, type $ sudo apt-get install mysql-server on your terminal. |
| Installation of MYSQL |
 |
| Configuration of MYSQL |
 |
| MYSQL testing |
To install PHP, type this command, $ sudo apt-get install php5.
 |
| Installation of PHP |
Creating Database
After the installation of MYSQL and PHP, building of the database to be used can now be done. To start MYSQL using terminal, type this commande: $ mysql -u root -p.
 |
| Start MYSQL |
 |
| Building the database |
The webpage should accept username and password from user. Also, the username and password can be edited by the user. It can also be deleted. There should be login and logout mechanism on the webpage.
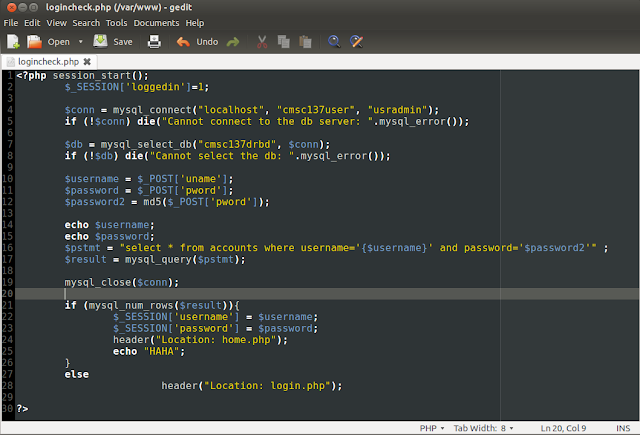
The following images are the scripts of the webpage.
1. The hompage.
 |
| Homepage script |
Login.php only get the username and password of the user.
Logincheck.php validates the username and password, and add it to the database.
3. Adding a user.
The add functionality works when the user click the link 'Add User'. It will prompt the user to give new username and password of the new user to be added. Then, it will be added to the database.
4. Editing the username and password of a user.
There is "Edit User" link that will allow the user to edit his/her username or password. Also, after changes are made, the database will be updated.
5.The logout part of the webpage.
LEARNING AND INSIGHTS + CONCLUSION
This activity brings back memories because we create databases without using xampp or wamp. Also, we created webpages like the old days. It refreshes our memories on CMSC 127 days where consoles are used in creating databases. We racked our brains for this. =)


